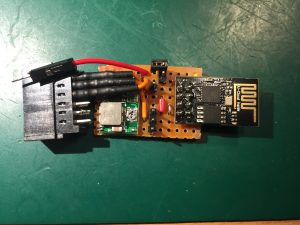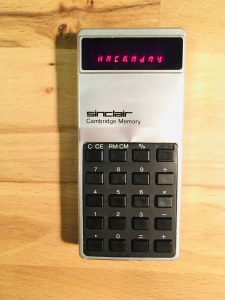
Low cost GPIB to USB adapter

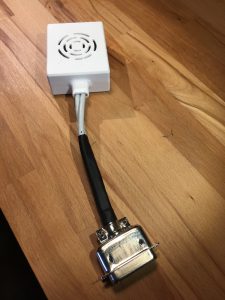
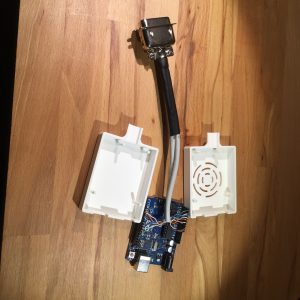
A simple GPIB to USB adapter using an Arduino Uno. Constructed following: http://egirland.blogspot.com/2014/03/arduino-uno-as-usb-to-gpib-controller.html

A 24-way connector (RS 239-1207) was used for the GBIP connector and wired to the Arduino with two lengths of cat 5 cable as follows:

cable 1 pin mapping
GBIP	Wire	Uno
1	wh/or	A0
2	or/wh	A1
3	wh/bl	A2
4	bl/wh	A3
13	wh/gr	A4
14	gr/wh	A5
GND	wh/br	GND
GND	br/wh	GND

cable 2 pin mapping
GBIP	Wire	Uno
5	wh/gr	12
6	gr/wh	11
7	wh/br	10
8	br/wh	9
9	bl/wh	8
11	wh/bl	7
15	or/wh	4
16	wh/or	5

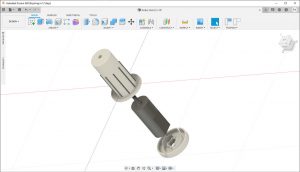
A 3D printed case was designed in Fusion 360. CAD files available here.

The Uno was programmed with GPIB6.1.ino available from Emanuele’s website.

Compact roller blind motor

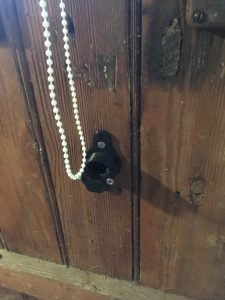
I have a few roller blinds ripe for automation. The first attempt used a stepper motor with a 3D printed cog to pull the cord.

Remains of cord puller

This worked but had the look of a Heath Robinson / Rube Goldberg love child so I looked for a neater solution.

Hardware

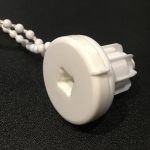
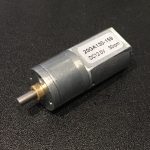
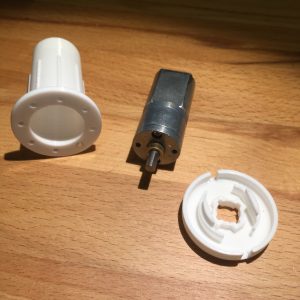
Tubular motors that fit inside the roller tube can be bought online but were rather expensive and bulky for my purposes so I opted for a more compact design. Taking measurements from the existing blind pulley mechanism and a suitable 30 RPM 12v DC motor with 20mm external diameter:

let me design a replacement in Fusion 360

Using a DC motor requires some sort of encoder to keep track of the blind position. I opted for a magnet/hall sensor mounted in the drive mechanism. This keeps the the sensor unobtrusive but limits the resolution to one revolution (about 10 cm of blind travel in my case). I hoped that combining this with timing data would be accurate enough. It was.

Output from the printer. Note a small 2 x 1 mm magnet has been inserted in one of the holes.

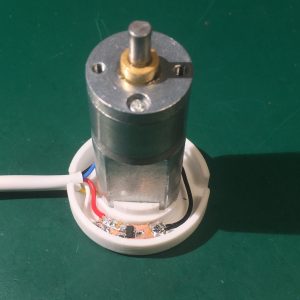
I hand carved a small PCB to hold the Si7025 hall effect sensor and connected everything up.

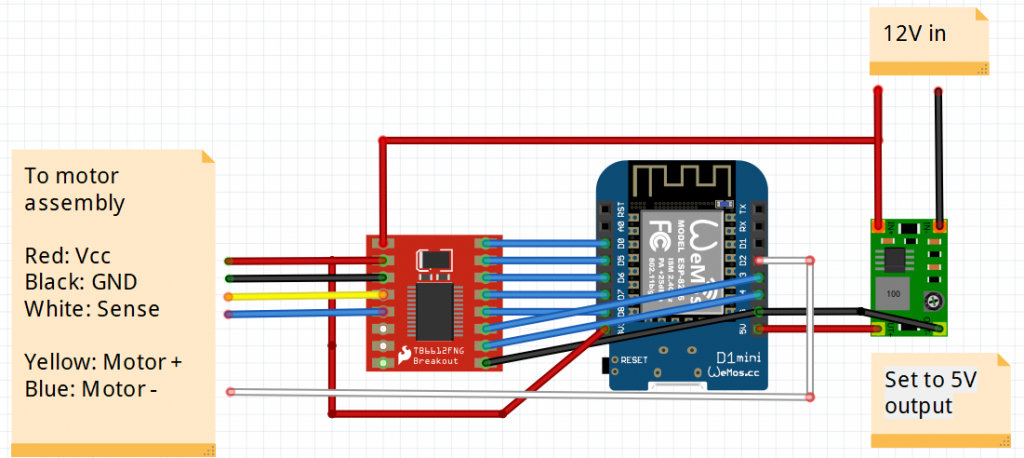
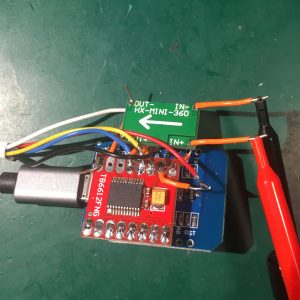
For the controller I used a Wemos D1 mini with a TB6612FNG driver module which can handle up to two DC motors. A small buck converter supplies 5V for the electronics from the 12V motor supply. All wired together in point to point style:

Software

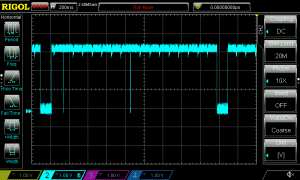
The code was written using the Arduino IDE. One unexpected problem was occasional glitches on the sensor output. This screenshot of the sensor output while running at 30 rpm shows the expected high -> low transitions as the magnet passes the sensor, but with the occasional spurious pulse. These pulses were always less than 1ms duration so are simply filtered out in software.

To move the blind to a given position, the software moves to the next magnet home position, then counts complete revolutions while timing how long each revolution takes, and then keeps the motor running for the required time to move the remaining distance.

An MQTT API was implemented, controlled from a Node Red flow.

Installation

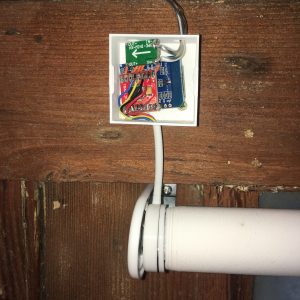
A small case to contain the electronics was 3D printed and wired up to a 12 V power supply.

And here are the blinds in action:

Blind goes up
Blind goes down

Files

https://github.com/ynformatics/roller-blind

Precision 30 A Current Shunt

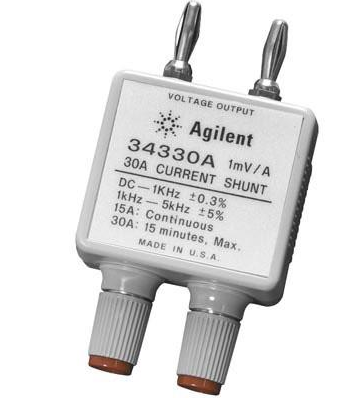
I needed a precision current shunt to calibrate a recently fixed E3631A power supply. The Agilent 34330A looks nice and is colour coordinated, but at $108 seemed a bit pricey for a resistor in a box.

Agilent 34330A

So let’s make a DIY clone…

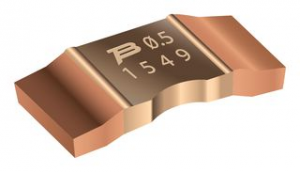
For the resistor we use an SMD Current Sense Resistor, 0.001 ohm, CSS2H-2512 Series, 2512 [6432 Metric], 5 W, ± 1%. This will give the required 1 mV/A response and can cope with a 30 A current.

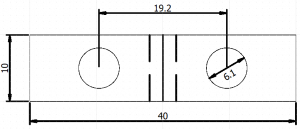
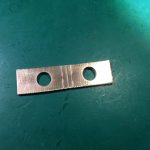
A small PCB was cut from a piece of copper clad FR4. The holes are 19.2 mm apart as this is a commonly used binding post separation. Care should be taken to route the sense connections as close to the ends of the resistor as possible.

The resistor and sense leads were soldered on

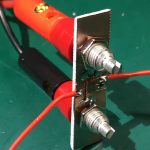
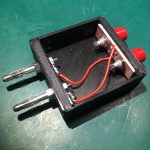
Mounted in a 3D printed box with banana sockets and plugs

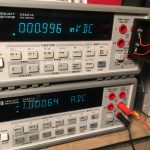
Here is the shunt under test showing we are within 1% tolerance.

A couple of lessons learned:

  1. If any solder gets on the resistive part of the resistor it will reduce the resistance!
  2. The sense connections must be connected as close to the ends of the resistor as possible. A few extra micro-ohms will exceed the tolerance.

DeLonghi DEM10 Dehumidifier fix

I have a three year old DeLonghi DEM10 dehumidifier whose low temperature warning light is now permanently on. The unit is indoors where the temperature never drops to such low levels.

Internet searching suggested a faulty capacitor on the main PCB. I replaced this but to no avail.

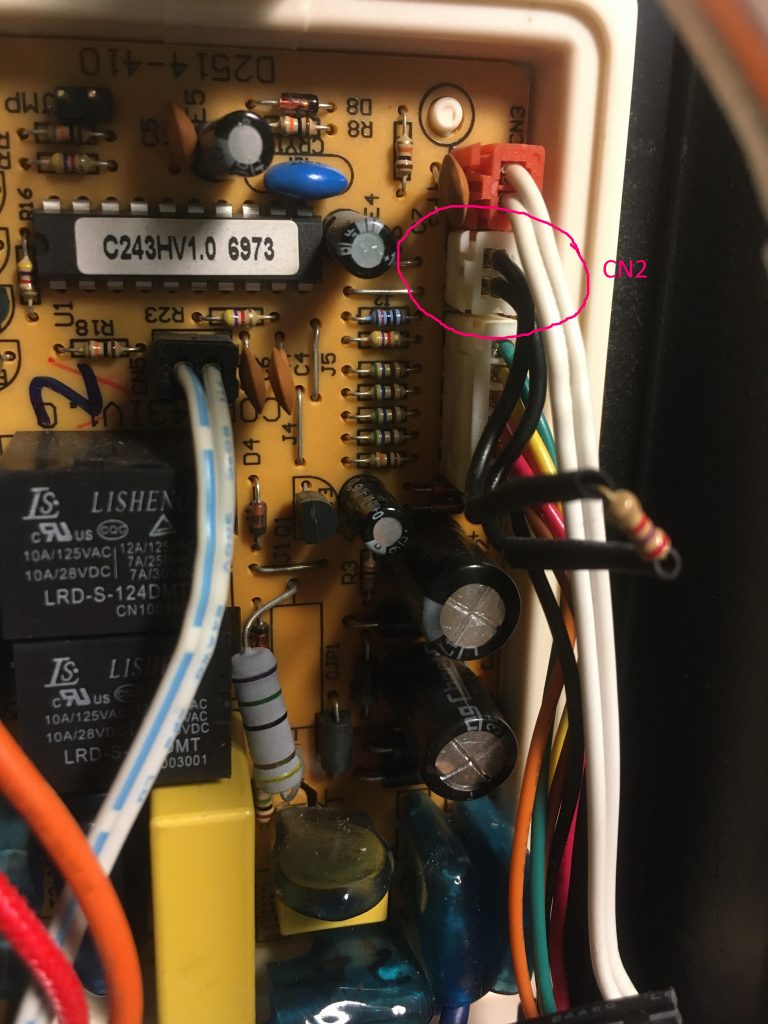
The schematic shows that connector CN2 leads to the temperature sensor. Disconnecting this and measuring with a multi-meter showed a sensor resistance of 650 ohm. I experimented with a few different resistances and it seems that anything above about 1500 ohms turns the warning light off. I settled for 2k7 ohms, cut the sensor lead, soldered it in place and covered with heat shrink.

All working now!

Variable Isolation Transformer

This project couples a variac with an isolation transformer.

Two design decisions to make:

1. Does the isolation transformer go before or after the variac? Here it was placed after the variac as the variac was rated to 4A and the transformer 5A. Any turn-on surge current will be less through the variac.

2. Is an earth connection passed through to the output socket? No, because it’s an isolation transformer 😉 For convenience the earth connection is made available separately on the front panel.

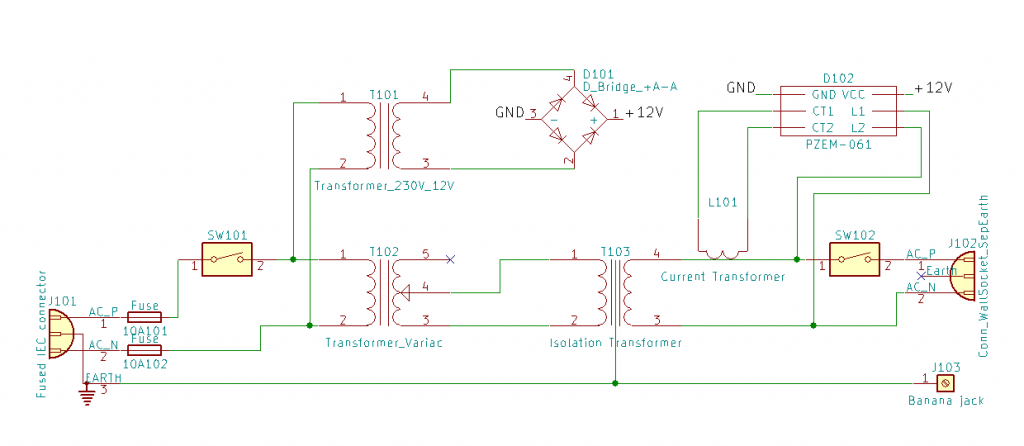
The schematic is straightforward:

A PZEM-061 module is used to display output voltage, current and power. It is hacked (ref 1) to run off a separate 12V supply which is sourced from a small transformer to maintain isolation.

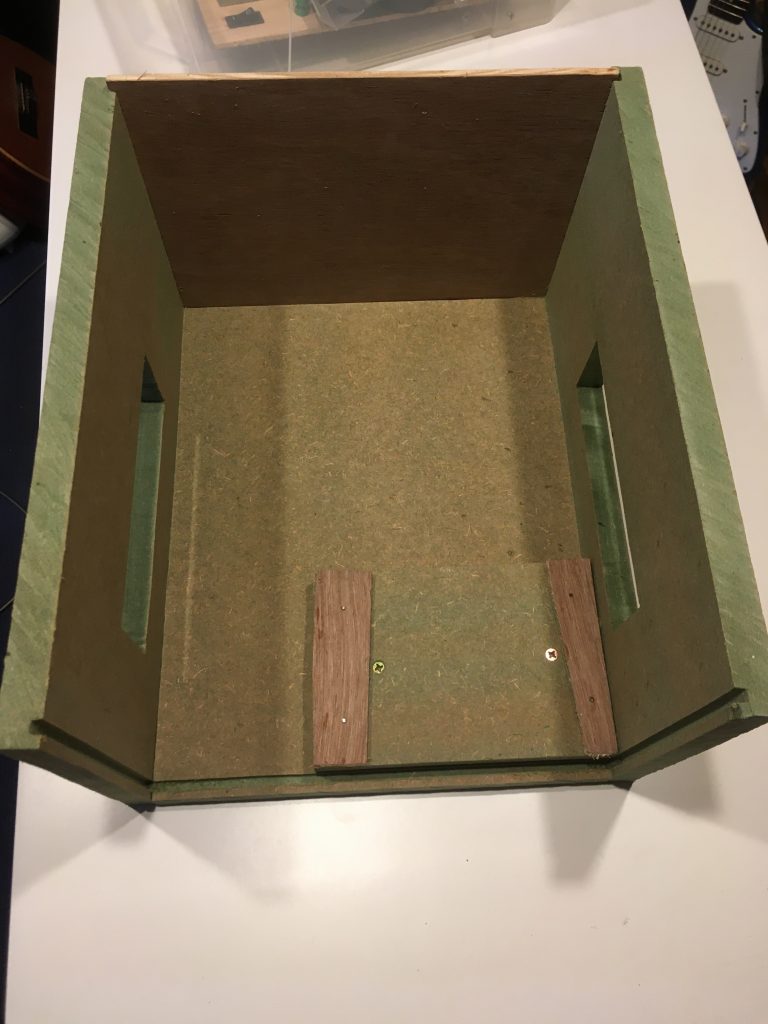
A box was constructed from MDF and plywood to contain the hardware.

With two large transformers the unit weighs in at 25 kg.

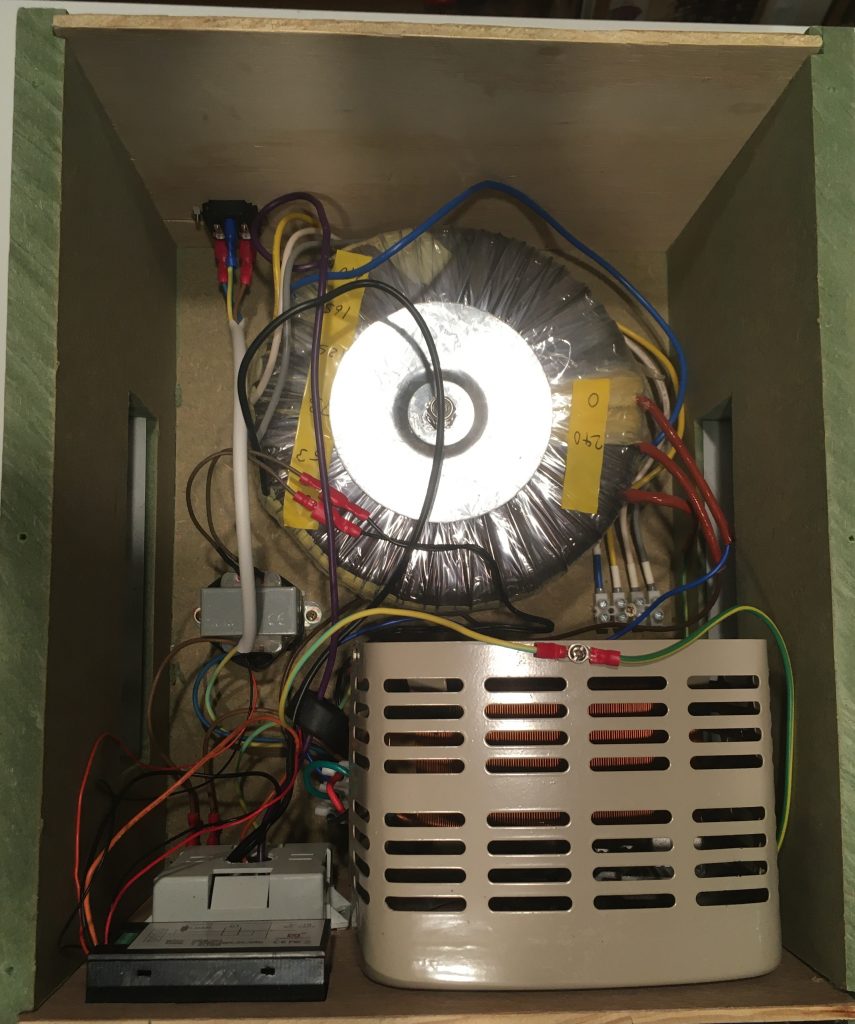
Interior view

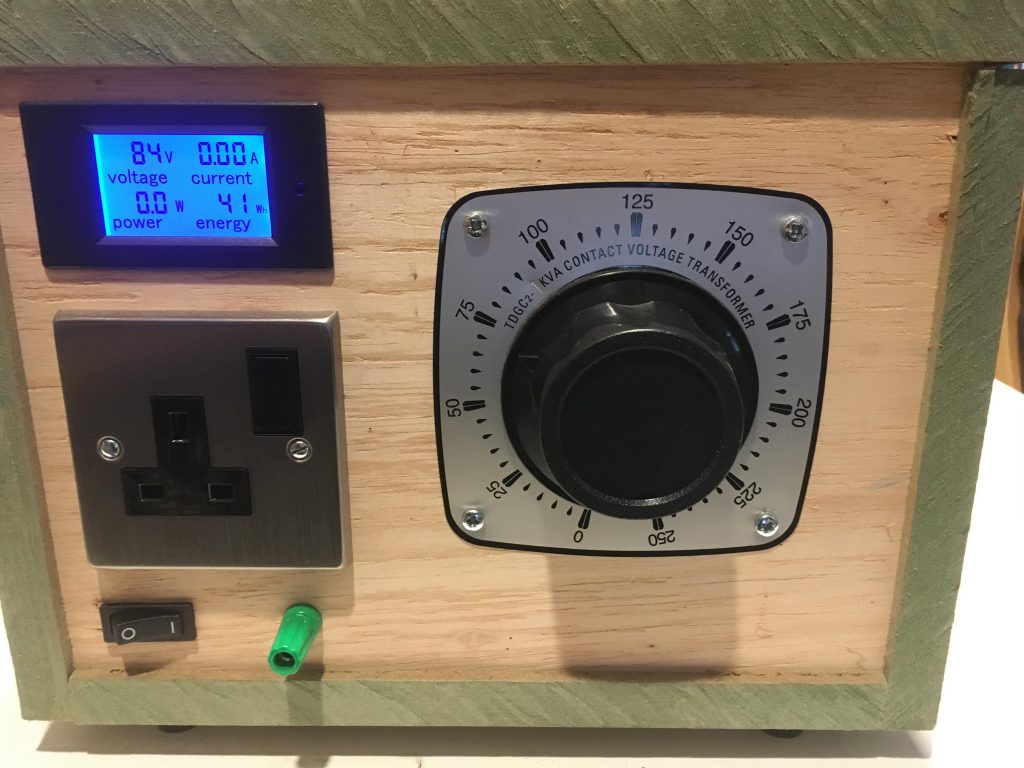
The variac was positioned so it pokes through a hole in the front panel. Re-using its original scale gives a rough idea of the voltage and tidies up the hole. Even the rubber feet were reused.

Front panel

All finished and ready to use.

Refs:

  1. https://web.archive.org/web/20190901144559/https://webx.dk/oz2cpu/energy-meter/energy-meter.htm

Lego Music

Description

This project describe the construction of a tangible user interface which allows the creation of music from an arrangement of physical blocks.

Coloured blocks are laid out on a flat surface and observed by an overhead camera. Computer vision algorithms are used to convert the pattern of blocks into a set of musical notes. Changing the position of the blocks changes the audio output in real-time.

Inspired by Yamaha’s Tenori-on

Details

Lego blocks (other plastic blocks are available) are arranged on a virtual 16 by 16 grid layout and a virtual cursor repeatedly scans the grid from left to right. As the cursor reaches each grid column, the blocks in that column trigger a note to be played, the pitch of which is determined by the vertical position of the block. Multiple blocks in a column result in multiple notes being played simultaneously.

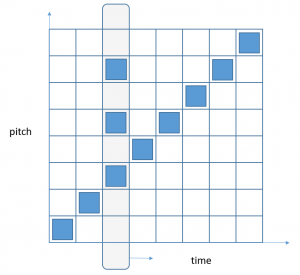
Here’s a diagram to show the principle more clearly. Time is on the horizontal axis and pitch on the vertical axis. (For simplicity this shows an 8 by 8 grid)


This arrangement of blocks would play an ascending scale. When the cursor is at the position shown a three note chord would be played.

The final pitch of a note is not only determined by the position on the grid, but also by the user-selectable scale. There are nine scales in the software which map position to pitch. The pitch can also be globally transposed in semitone or octave increments.

Hardware design

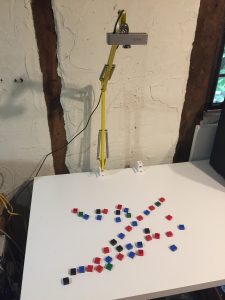
The hardware consists of a webcam and some blocks. The webcam is connected to a laptop where all image processing and sound generation takes place.

To keep it simple Lego blocks were used. They have a consistent size and shape and should make it easier for the computer vision system to reliably track them. It was found that yellow blocks were not reliably detected and are more sensitive to lighting conditions. Other darker colours worked better.

The webcam used was a “GUCEE HD92 720P” model. A resolution of 640 x 480 is sufficient for this project so most webcams should work OK.

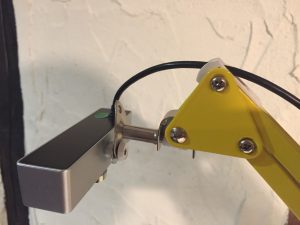
The webcam was mounted directly over the blocks using a hacked IKEA Tertial lamp. The original webcam clip was removed and the lamp bracket drilled out to accept the fitting.


For audio output the built-in PC sound card was used.

Software Overview

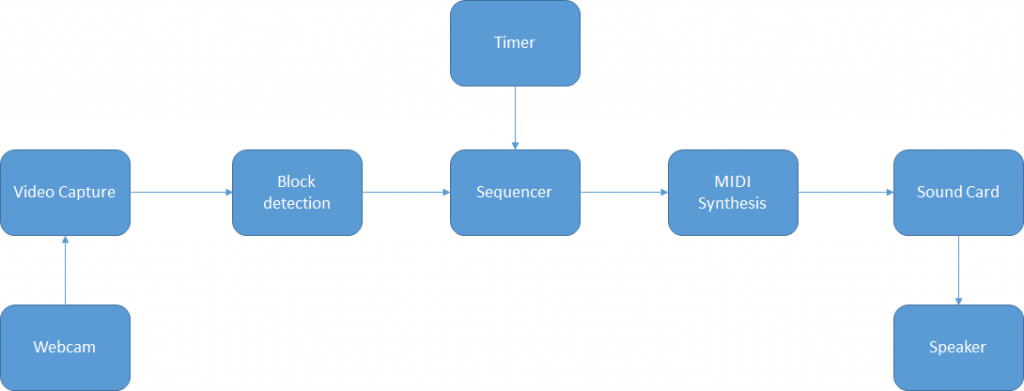
The overview of the system is as follows:

On the left are the vision components. These are responsible for getting images of the blocks from the webcam and converting them into a set of notes to be played. Open CV is a well known library for image processing and here we use the Emgu.CV wrapper for C#/.Net

On the right are the audio components. These convert the extracted notes into sound. The NAudio library is used for MIDI sound synthesis.

Software – Audio subsystem

The key component here is the Sequencer. This maintains the sequence of notes to be played and steps from one set of notes to another on receipt of a timer tick. Once the last note has been played it repeats from the beginning.

The human ear is very sensitive to changes in timing of sounds, so it’s important to use a regular beat for the timer. Standard Windows timers have a resolution of about 15 ms which is not quite good enough. Using the multimedia timer gives a resolution down to 1 ms and can be set to generate a periodic time tick with good consistency.

To simplify the audio output code MIDI synthesis is used. This avoids having to deal with analogue waveforms and keeps all audio in the digital domain. For this project the built-in Windows Microsoft GS Wavetable MIDI Synth is used. This is not the best sounding, but it allows up to 32 notes to be played simultaneously from a selection of 127 instruments and is adequate for our purposes.

The sequencer component can be run and tested independently. A sequence can be loaded using the SetNotes method which takes a 2-dimensional array of Notes and will then play that sequence in a loop until stopped.

Software – Vision subsystem

The job of the vision subsystem is to keep the sequencer updated as the arrangement of the blocks is changed.

The software continually grabs video frames from the webcam, identifies the block positions and maps them to cells on a 16 by 16 virtual grid. These cells are then converted to an array of notes for loading into the sequencer.

To identify the blocks the “SimpleBlobDetector” class from Emgu.CV is used. As the name suggests this identifies blobs in an image and outputs a list of the blob centroids (the coordinates of the block centres). The blob detector can be configured to only accept blobs in a certain size range, which can be optimised by trial and error for the particular blocks used.

Once the block coordinates are obtained they can be mapped to the nearest grid cells and then to an array of notes, the cell row and column giving the pitch and order of the notes respectively. The note array is then loaded into the sequencer.

This process runs independently of the sequencer so differences in frame rate or blob detection time do not affect the timing of the audio output.

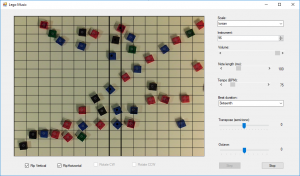
The video sub system also displays the captured images and overlays some markers showing the positions of detected blocks and the current grid column being played.

User Interface

In addition to the tangible blocks interface there is a traditional Windows Forms user interface. This allows parameters such as tempo, instrument, transposition and octave parameters to be set. These parameters can be altered while the audio is playing and it will react in real time.

The user interface also shows the view from the webcam and overlays some markers showing the positions of detected blocks and the current grid column being played.


Demo Videos


References

Software available for download from:https://github.com/ynformatics/LegoMusic

Yamaha Tenori-on https://en.wikipedia.org/wiki/Yamaha_Tenori-on

Featured on Hackaday! https://hackaday.com/2018/12/30/turning-lego-blocks-into-music-with-opencv/

Ohaus Scout Pro Wireless Interface Hack

Introduction

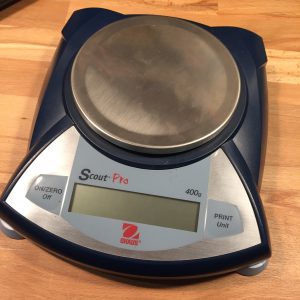
A potential project required wireless connectivity to an Ohaus Scout Pro SPU401 balance.

This balance takes a proprietary USB or RS232 adaptor which plugs into a 2×6-way edge connector on the PCB, but as an adaptor costs more than the balance cost on eBay it was decided to hack it.

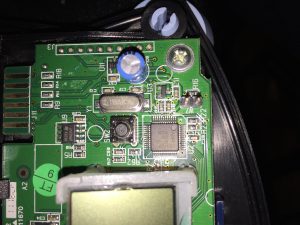
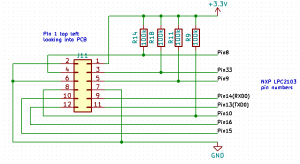
Tracing out the edge connector pins on the balance PCB to the NXP LPC2103 micro-controller revealed the following circuit fragment:

An extra menu item only appears on the balance’s display when a serial adaptor is plugged in, so a reasonable guess was that the lines with pull-up resistors are pulled low in some combination by the adaptor to enable the unit to recognise it. And indeed after some experimentation it was found that starting the unit up with pin 8 grounded adds the Print and USB options to the menu. Grounding pin 33 on startup adds Print and RS232 items.

Navigating through the new menu options, setting baud rate to 9600,N,1 and print setting to continuous non-stable showed the expected serial output on TXD0 pin.

Hardware

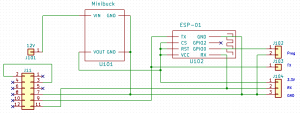
The idea was to use an ESP8266 module to send and receive serial data from the balance to an MQTT topic. The edge connector has a 3.3V pin available, however the balance powers off if more than about 100 mA current is drawn. This was not enough to power the ESP8266 so a mini-buck regulator was used and fed directly from the 12V input jack.

Final hardware schematic:

And all wired together on a small strip-board. A 12 way, 2 row, 2.54mm pitch female edge connector (RS718-8245) from TE was used:

Software

A simple program to send/receive any serial traffic to an MQTT topic was downloaded to the ESP8266. Commands can be sent to/from the balance by publishing/subscribing to the “ohaus” topic.

Arduino powered Vileda cleaning robot – Part 2 (software)

Part 1 described the hardware portion of this project. TL;DR: the existing microprocessor was replaced with an Arduino.

Part 2 covers the low level robot control and iRobot Create emulation software.

A couple of hardware modifications have been made since part 1 was written:

  1. The Arduino Uno was replaced by a Nano. This is not only a lot smaller but also has a couple of extra IO ports.
  2. A battery voltage sensor was added in the form of a simple 4:1 resistor divider.

Thearduino pin mapping is now:

μC Pin Function Arduino Pin/Dir Notes
1 Right Bumper D6 In HIGH on bump
2 Over current In Unused
3
4 Right wheel forward D10 Out PWM IN1
5 Right wheel backward D9 Out PWM IN2
6
7 Fan & Side brush motor Out Unused
8 Wheels up D11 In All 3 wheels OR’ed
9 L switch D12 In LOW when pressed
10 L switch LED D13 Out Active LOW
11
12 M switch A6 In LOW when pressed
13 S switch A7 In LOW when pressed
14 Green LED A2 Out Active LOW
15 Red LED A3 Out Active LOW
16 M switch LED A4 Out Active LOW
17 S switch LED A5 Out Active LOW
NC Battery Voltage A0 In Via 4:1 divider
19
20 GND GND
21 Left wheel forward D3 Out PWM IN4
22 Left wheel backwards D5 Out PWM IN3
23 Left bumper D2 In HIGH on bump
24 Speaker D4 Out
25
26 Main brush motor A1 Out Unused
27
28
29
30
31
32
33
34
35 Left wheel encoder D7 In
36
37
38
39 Right wheel encoder D8 In
40 +5V regulated 5V


For the software it was decided to emulate an iRobot Create 2. This has a documented API (iRobot Create 2 Open Interface) so all design decisions have already been made. Also, because this is a popular platform, third party software exists to directly control the robot and a driver for ROS integration is available.

Not all of the Open Interface commands were implemented, just those required for motor control, odometry and common sensors. The source code can be extended as needed. Some constants may need changing.

The code is straight forward in operation:

  • The serial port is monitored for any incoming commands. The commands are parsed and executed which results in motors running, sensor data being returned or robot state being updated.
  • Wheel encoder pulses are accumulated via two interrupt handlers
  • Every 15ms the internal state is updated. Sensor data is streamed out if requested. If the robot is moving, the motor power is updated. In normal driving mode (velocity and radius specified) a PID controller for average velocity is cascaded with another PID controller to keep the wheel speeds in the required ratio for the specified turn radius. In “Direct” driving mode (velocity of each wheel specified), two PID controllers, one for each wheel, are used to keep the velocities at the requested values
  • The Arduino PID Library is used with some modifications including bias value support

Full code available on GitHub here.

To verify compatibility the code was tested with the following:

  • The Create.1.0.1.2.exe program from here. (If running on Windows 10 need to run as administrator). Local copy here.
  • The create_autonomy ROS driver


Arduino powered Vileda cleaning robot

Part 2 (software) now available

I needed a robot platform for a project and bought a Vileda A3 cleaning robot cheaply from ebay, advertised as not working but a new battery fixed that! (Battery for Vileda M-488a fits this A3 model)

Opening it up:

we find the expected motors for the wheels, fan, main brush and edge brush. The wheels are equipped with optical encoders. Other sensors include the left and right bumpers, wheel drop switches and cliff detectors. The top lid holds three buttons and a red and green LED. There is a 360 IR reflector installed but this is not populated with a detector.

There is a self-contained NiMH battery charger board under the top lid:

Rather than totally replace the existing PCB I decided to just replace the microcontroller (an 8051 clone) so I could keep the existing motor drivers, connectors etc

After a bit of reverse engineering I came up with the following PCB pin assignments:

μC Pin Function Arduino Pin/Dir Notes
1 Right Bumper D6 In HIGH on bump
2 Over current In Unused
3
4 Right wheel forward D10 Out PWM IN1
5 Right wheel backward D9 Out PWM IN2
6
7 Fan & Side brush motor Out Unused
8 Wheels up D13 In All 3 wheels OR’ed
9 L switch D12 In LOW when pressed
10 L switch LED D11 Out Active LOW
11
12 M switch A0 In LOW when pressed
13 S switch A1 In LOW when pressed
14 Green LED A2 Out Active LOW
15 Red LED A3 Out Active LOW
16 M switch LED A4 Out Active LOW
17 S switch LED A5 Out Active LOW
18
19
20 GND
21 Left wheel forward D3 Out PWM IN4
22 Left wheel backwards D5 Out PWM IN3
23 Left bumper D2 In HIGH on bump
24 Speaker D4 Out
25
26 Main brush motor Out Unused
27
28
29
30
31
32
33
34
35 Left wheel encoder D7 In
36
37
38
39 Right wheel encoder D8 In
40 +5V regulated

N.B. pin 9 was wired as an 8051 interrupt circuit so I modified PCB to make it a simple switched input (removed C23 and R89 and wired J7 pin 4 directly to μC pin 9).

I didn’t need the cliff sensors so didn’t trace those out.

The motor driver chip is an Allegro A4954 dual 2A/40V h-bridge. Current limit is pre-set. Pins IN1-IN4 of this chip are routed to the microcontroller.

Not much room around the PCB in-situ so I removed the microcontroller, soldered flying leads directly to the PCB and routed them to the indicated arduino pins. I wanted to keep the Rx/Tx pins free so only had 18 pins to play with. It should be possible to multiplex some inputs if needed in the future. Here is the hacked board under test:

and here it is embedded back in the robot:

The PCB is a tight fit and once the main brush motor is removed there is just enough space for the Arduino to sit in its place.

A simple program was written to exercise the main features. Here is a short video showing the response to bumpers and a quick demo routine that cycles through the LEDs, plays a tune and does a little dance.


Scratchy


Santa delivered a vinyl record player this year! We had great fun listening to old records from our past. One of the best things about the vinyl experience is the excellent user interface, with touch, feel and even smell. But our record collection is not in the best shape and after a while I missed the less scratchy digital downloads I’d become used to. So I looked for a way to combine the user interface of vinyl with the more predictable quality of mp3 files, and the result wasScratchy!

The idea is to connect the turntable audio output via a black box to an Android app, which listens to what is being played, identifies the album, and plays a digital version of it. At the top level the system looks like this:

Record Player -> Black Box -> Android App -> Amplifier -> Speakers

The black box has two main purposes:

  1. to trick the android phone into thinking there is a microphone attached. This just requires a 2.2k resistor from the mic input to ground. Any value resistor above 1k will do, lower values may trigger the phone to mute the audio.
  2. to drop the voltage from line level to mic level and to combine the stereo channels into one. A simple 100:1 resistor divider does the job. This is not needed if the turntable outputs a low level signal.

Here is the schematic:

And here is a view inside the black box:


In normal operation the android app runs in a loop as follows:

  1. Listen for a new record being played
  2. Identify the album
  3. Play a digital version of the album
  4. Continue to listen to the turntable output and stop the currently playing album if a period of silence is heard (needle up)
  5. Back to 1

Album identification is done by listening to the first five seconds of audio, fingerprinting it, and then looking up the fingerprint in a database. Fingerprinting is based on an algorithm published by Shazam (ref). The incoming audio is split into 0.1 second samples which are Fourier-transformed, and a set of representative note pairs extracted. See the linked reference for more details on how this works.

The app is trained to recognise new albums by switching to Learn mode, entering the name of the m3u file that it corresponds to, and then playing the album. When audio starts, the app will fingerprint about 7 seconds of it and store the fingerprint together with the m3u filename in a database.

The source album doesn’t need to be of high quality – old scratched records work just as well, as long as the first few seconds can be played and recognised. It is even possible to associate a digital album with a completely different physical record!

Here is a short video of Scratchy in operation:

The android app was written in C# using the Xamarin framework. Full source code can be found here: https://github.com/ynformatics/scratchy

I hope you find it useful.