Description
This project describe the construction of a tangible user interface which allows the creation of music from an arrangement of physical blocks.
Coloured blocks are laid out on a flat surface and observed by an overhead camera. Computer vision algorithms are used to convert the pattern of blocks into a set of musical notes. Changing the position of the blocks changes the audio output in real-time.
Inspired by Yamaha’s Tenori-on
Details
Lego blocks (other plastic blocks are available) are arranged on a virtual 16 by 16 grid layout and a virtual cursor repeatedly scans the grid from left to right. As the cursor reaches each grid column, the blocks in that column trigger a note to be played, the pitch of which is determined by the vertical position of the block. Multiple blocks in a column result in multiple notes being played simultaneously.
Here’s a diagram to show the principle more clearly. Time is on the horizontal axis and pitch on the vertical axis. (For simplicity this shows an 8 by 8 grid)
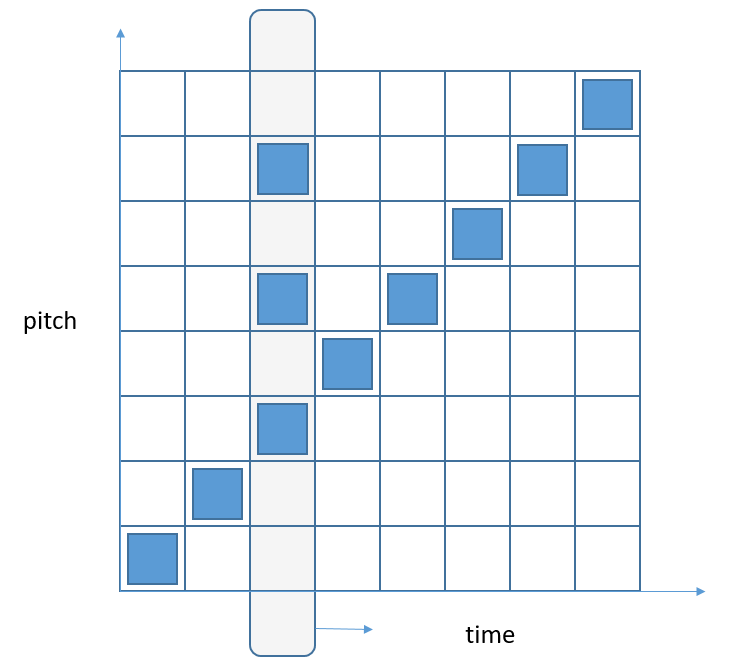
The final pitch of a note is not only determined by the position on the grid, but also by the user-selectable scale. There are nine scales in the software which map position to pitch. The pitch can also be globally transposed in semitone or octave increments.
Hardware design
The hardware consists of a webcam and some blocks. The webcam is connected to a laptop where all image processing and sound generation takes place.
To keep it simple Lego blocks were used. They have a consistent size and shape and should make it easier for the computer vision system to reliably track them. It was found that yellow blocks were not reliably detected and are more sensitive to lighting conditions. Other darker colours worked better.
The webcam used was a “GUCEE HD92 720P” model. A resolution of 640 x 480 is sufficient for this project so most webcams should work OK.
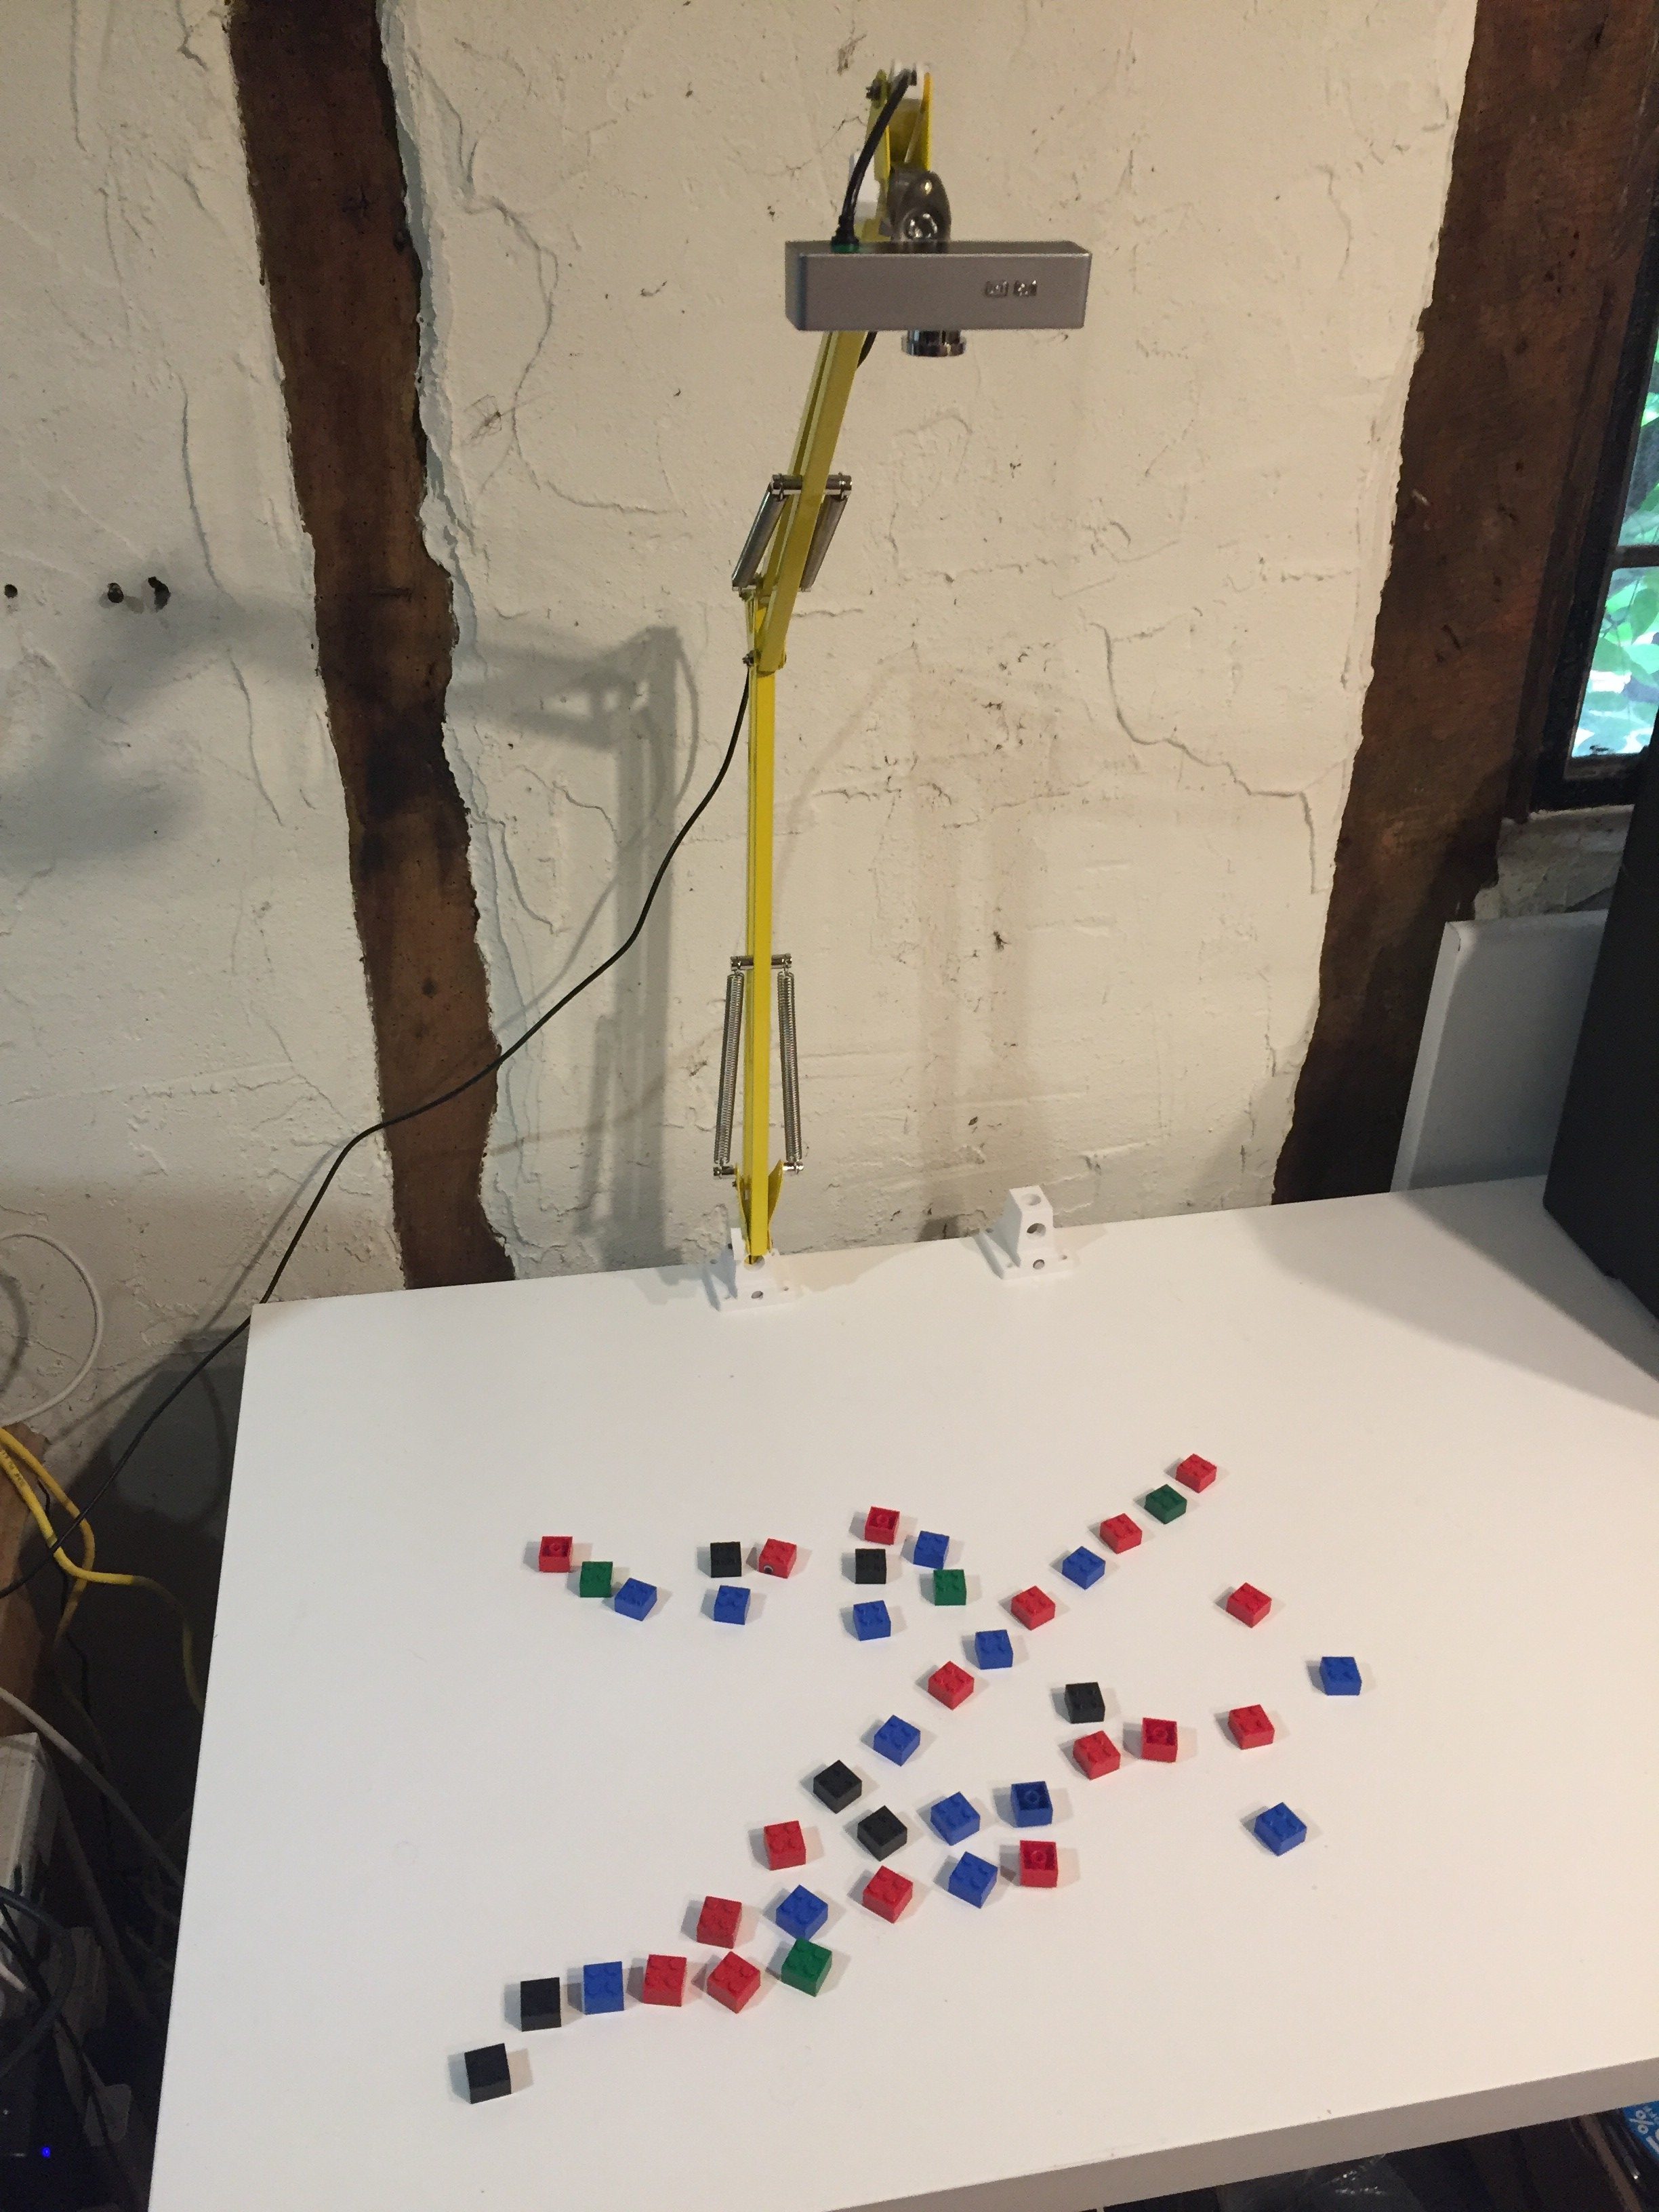
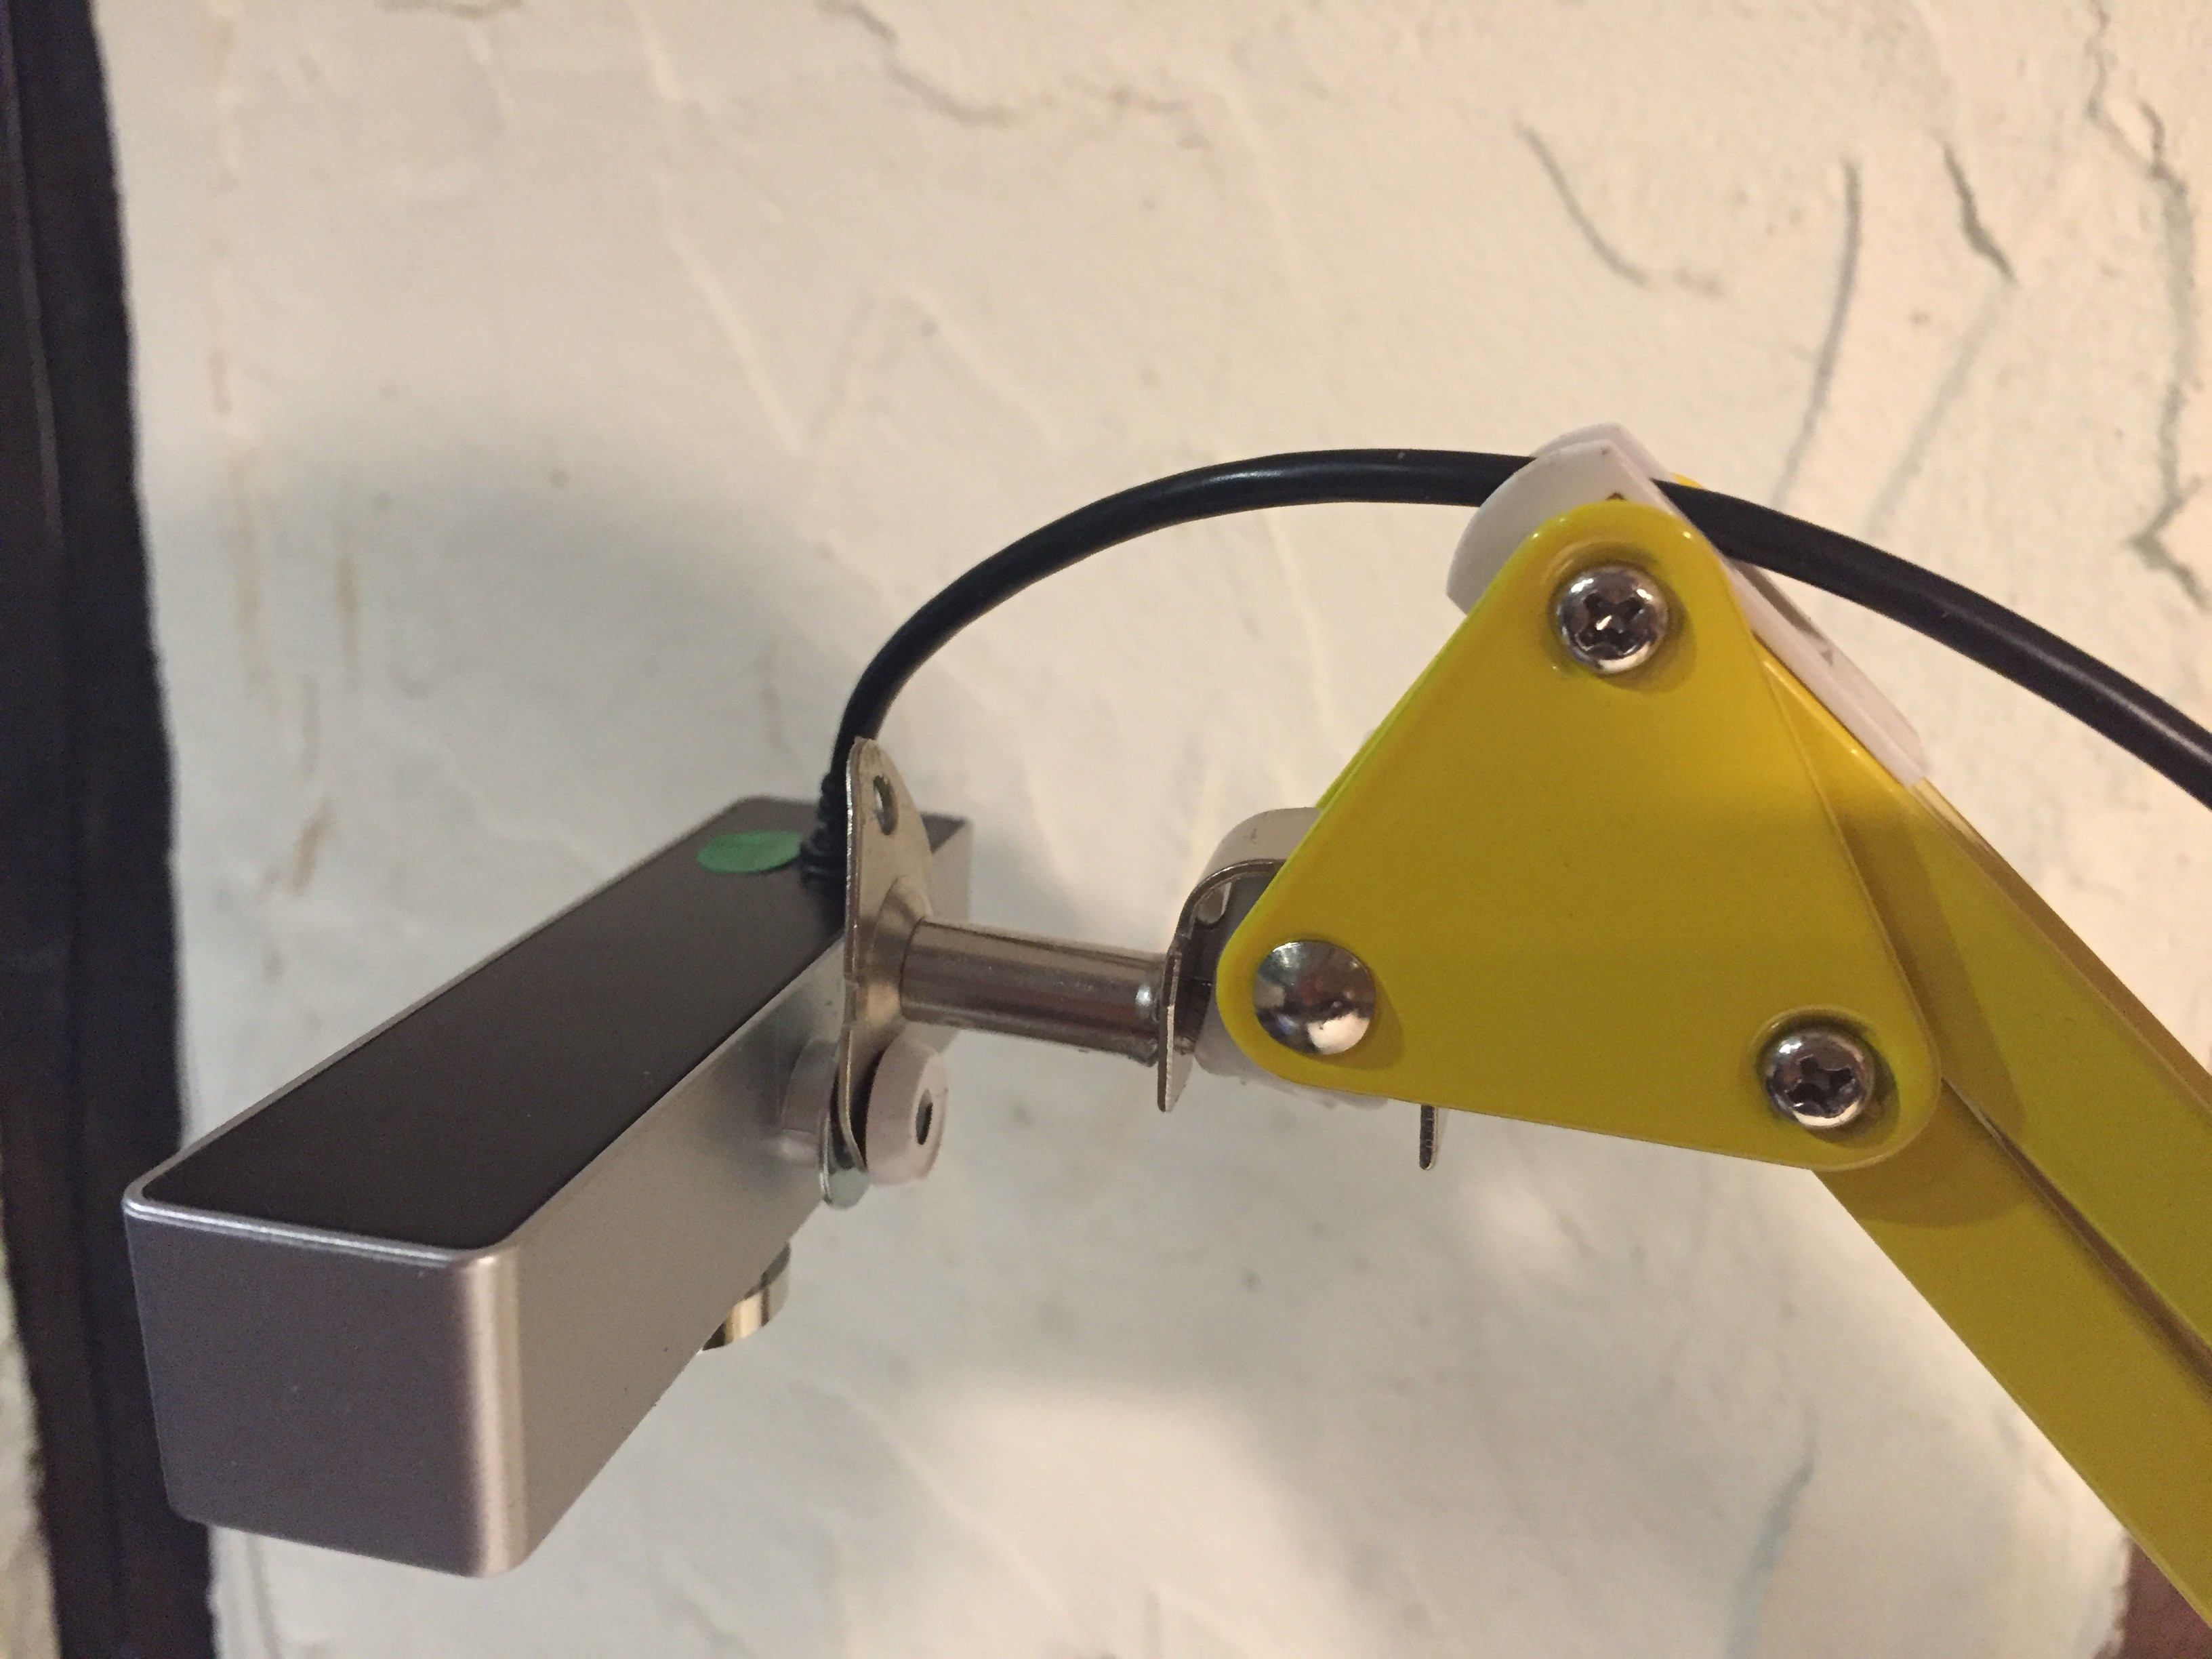
The webcam was mounted directly over the blocks using a hacked IKEA Tertial lamp. The original webcam clip was removed and the lamp bracket drilled out to accept the fitting.
For audio output the built-in PC sound card was used.
Software Overview
The overview of the system is as follows:
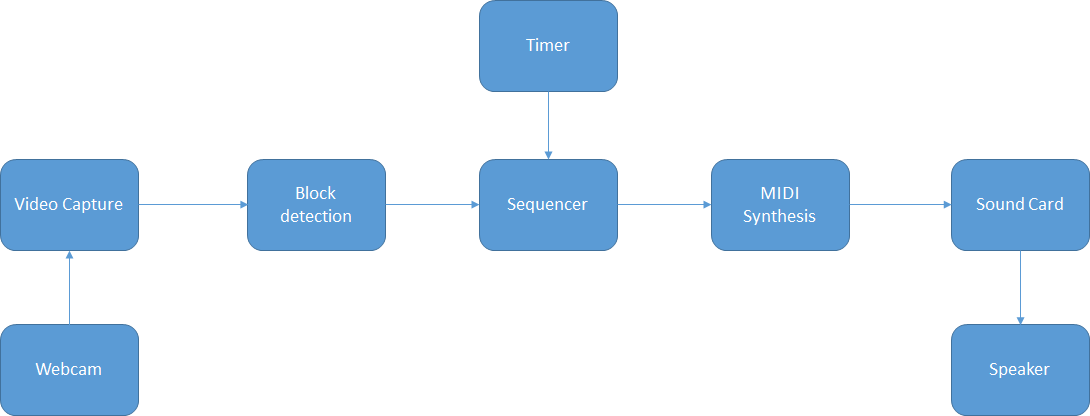
On the left are the vision components. These are responsible for getting images of the blocks from the webcam and converting them into a set of notes to be played. Open CV is a well known library for image processing and here we use the Emgu.CV wrapper for C#/.Net
On the right are the audio components. These convert the extracted notes into sound. The NAudio library is used for MIDI sound synthesis.
Software – Audio subsystem
The key component here is the Sequencer. This maintains the sequence of notes to be played and steps from one set of notes to another on receipt of a timer tick. Once the last note has been played it repeats from the beginning.
The human ear is very sensitive to changes in timing of sounds, so it’s important to use a regular beat for the timer. Standard Windows timers have a resolution of about 15 ms which is not quite good enough. Using the multimedia timer gives a resolution down to 1 ms and can be set to generate a periodic time tick with good consistency.
To simplify the audio output code MIDI synthesis is used. This avoids having to deal with analogue waveforms and keeps all audio in the digital domain. For this project the built-in Windows Microsoft GS Wavetable MIDI Synth is used. This is not the best sounding, but it allows up to 32 notes to be played simultaneously from a selection of 127 instruments and is adequate for our purposes.
The sequencer component can be run and tested independently. A sequence can be loaded using the SetNotes method which takes a 2-dimensional array of Notes and will then play that sequence in a loop until stopped.
Software – Vision subsystem
The job of the vision subsystem is to keep the sequencer updated as the arrangement of the blocks is changed.
The software continually grabs video frames from the webcam, identifies the block positions and maps them to cells on a 16 by 16 virtual grid. These cells are then converted to an array of notes for loading into the sequencer.
To identify the blocks the “SimpleBlobDetector” class from Emgu.CV is used. As the name suggests this identifies blobs in an image and outputs a list of the blob centroids (the coordinates of the block centres). The blob detector can be configured to only accept blobs in a certain size range, which can be optimised by trial and error for the particular blocks used.
Once the block coordinates are obtained they can be mapped to the nearest grid cells and then to an array of notes, the cell row and column giving the pitch and order of the notes respectively. The note array is then loaded into the sequencer.
This process runs independently of the sequencer so differences in frame rate or blob detection time do not affect the timing of the audio output.
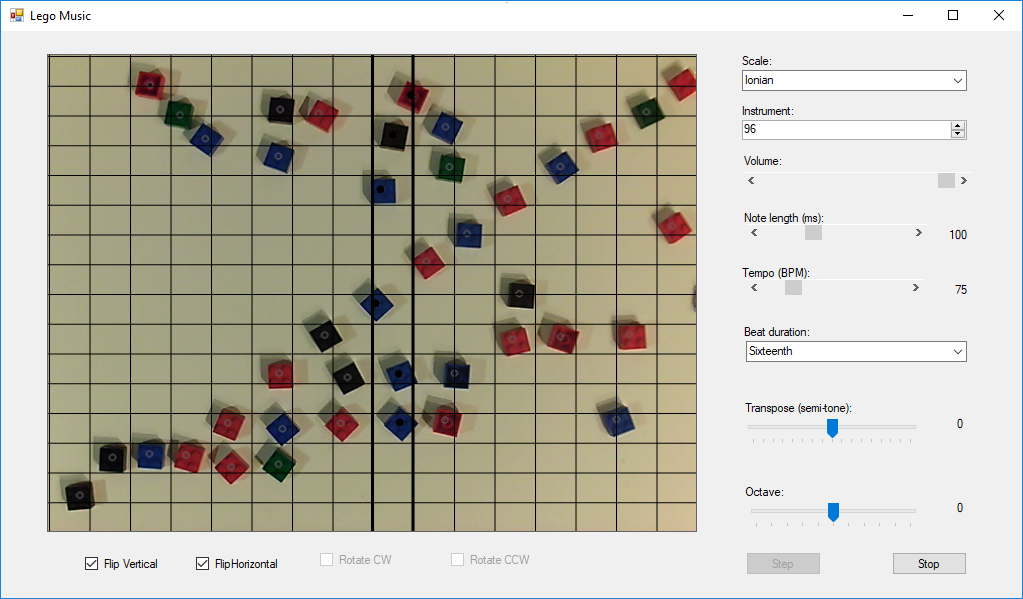
The video sub system also displays the captured images and overlays some markers showing the positions of detected blocks and the current grid column being played.
User Interface
In addition to the tangible blocks interface there is a traditional Windows Forms user interface. This allows parameters such as tempo, instrument, transposition and octave parameters to be set. These parameters can be altered while the audio is playing and it will react in real time.
The user interface also shows the view from the webcam and overlays some markers showing the positions of detected blocks and the current grid column being played.
Demo Videos
References
Software available for download from:https://github.com/ynformatics/LegoMusic
Yamaha Tenori-on https://en.wikipedia.org/wiki/Yamaha_Tenori-on
Featured on Hackaday! https://hackaday.com/2018/12/30/turning-lego-blocks-into-music-with-opencv/
really funny and efficient project! i ‘m an art teacher and use your soft at home in order to draw music with my kids. as a newbie I’m a bit confused with midi message. I’d like to route midi out on my hardware synth using usbtomidi, but don’t know where to start on your solution. Modify sequencer.cs?
please help!
many thx,
Alex
Hi, thanks for the comment!
I don’t have a hardware midi player, but if one is plugged in then it should appear to the app as a midi device with a distinct id.
I suggest you start by editing the LegoMusic.exe.config file. Look for the line:
add key=”mididevice” value=”0″
Value=”0″ tells the app to use the software MIDI emulator so try changing the value to “1”. Then save the file and re-start the app. If that doesn’t work then try 2!
If you are a developer you could try a more scientific approach and enumerate the midi devices (see https://github.com/naudio/NAudio/blob/master/Docs/MidiInAndOut.md)
Hope that helps!
Paul