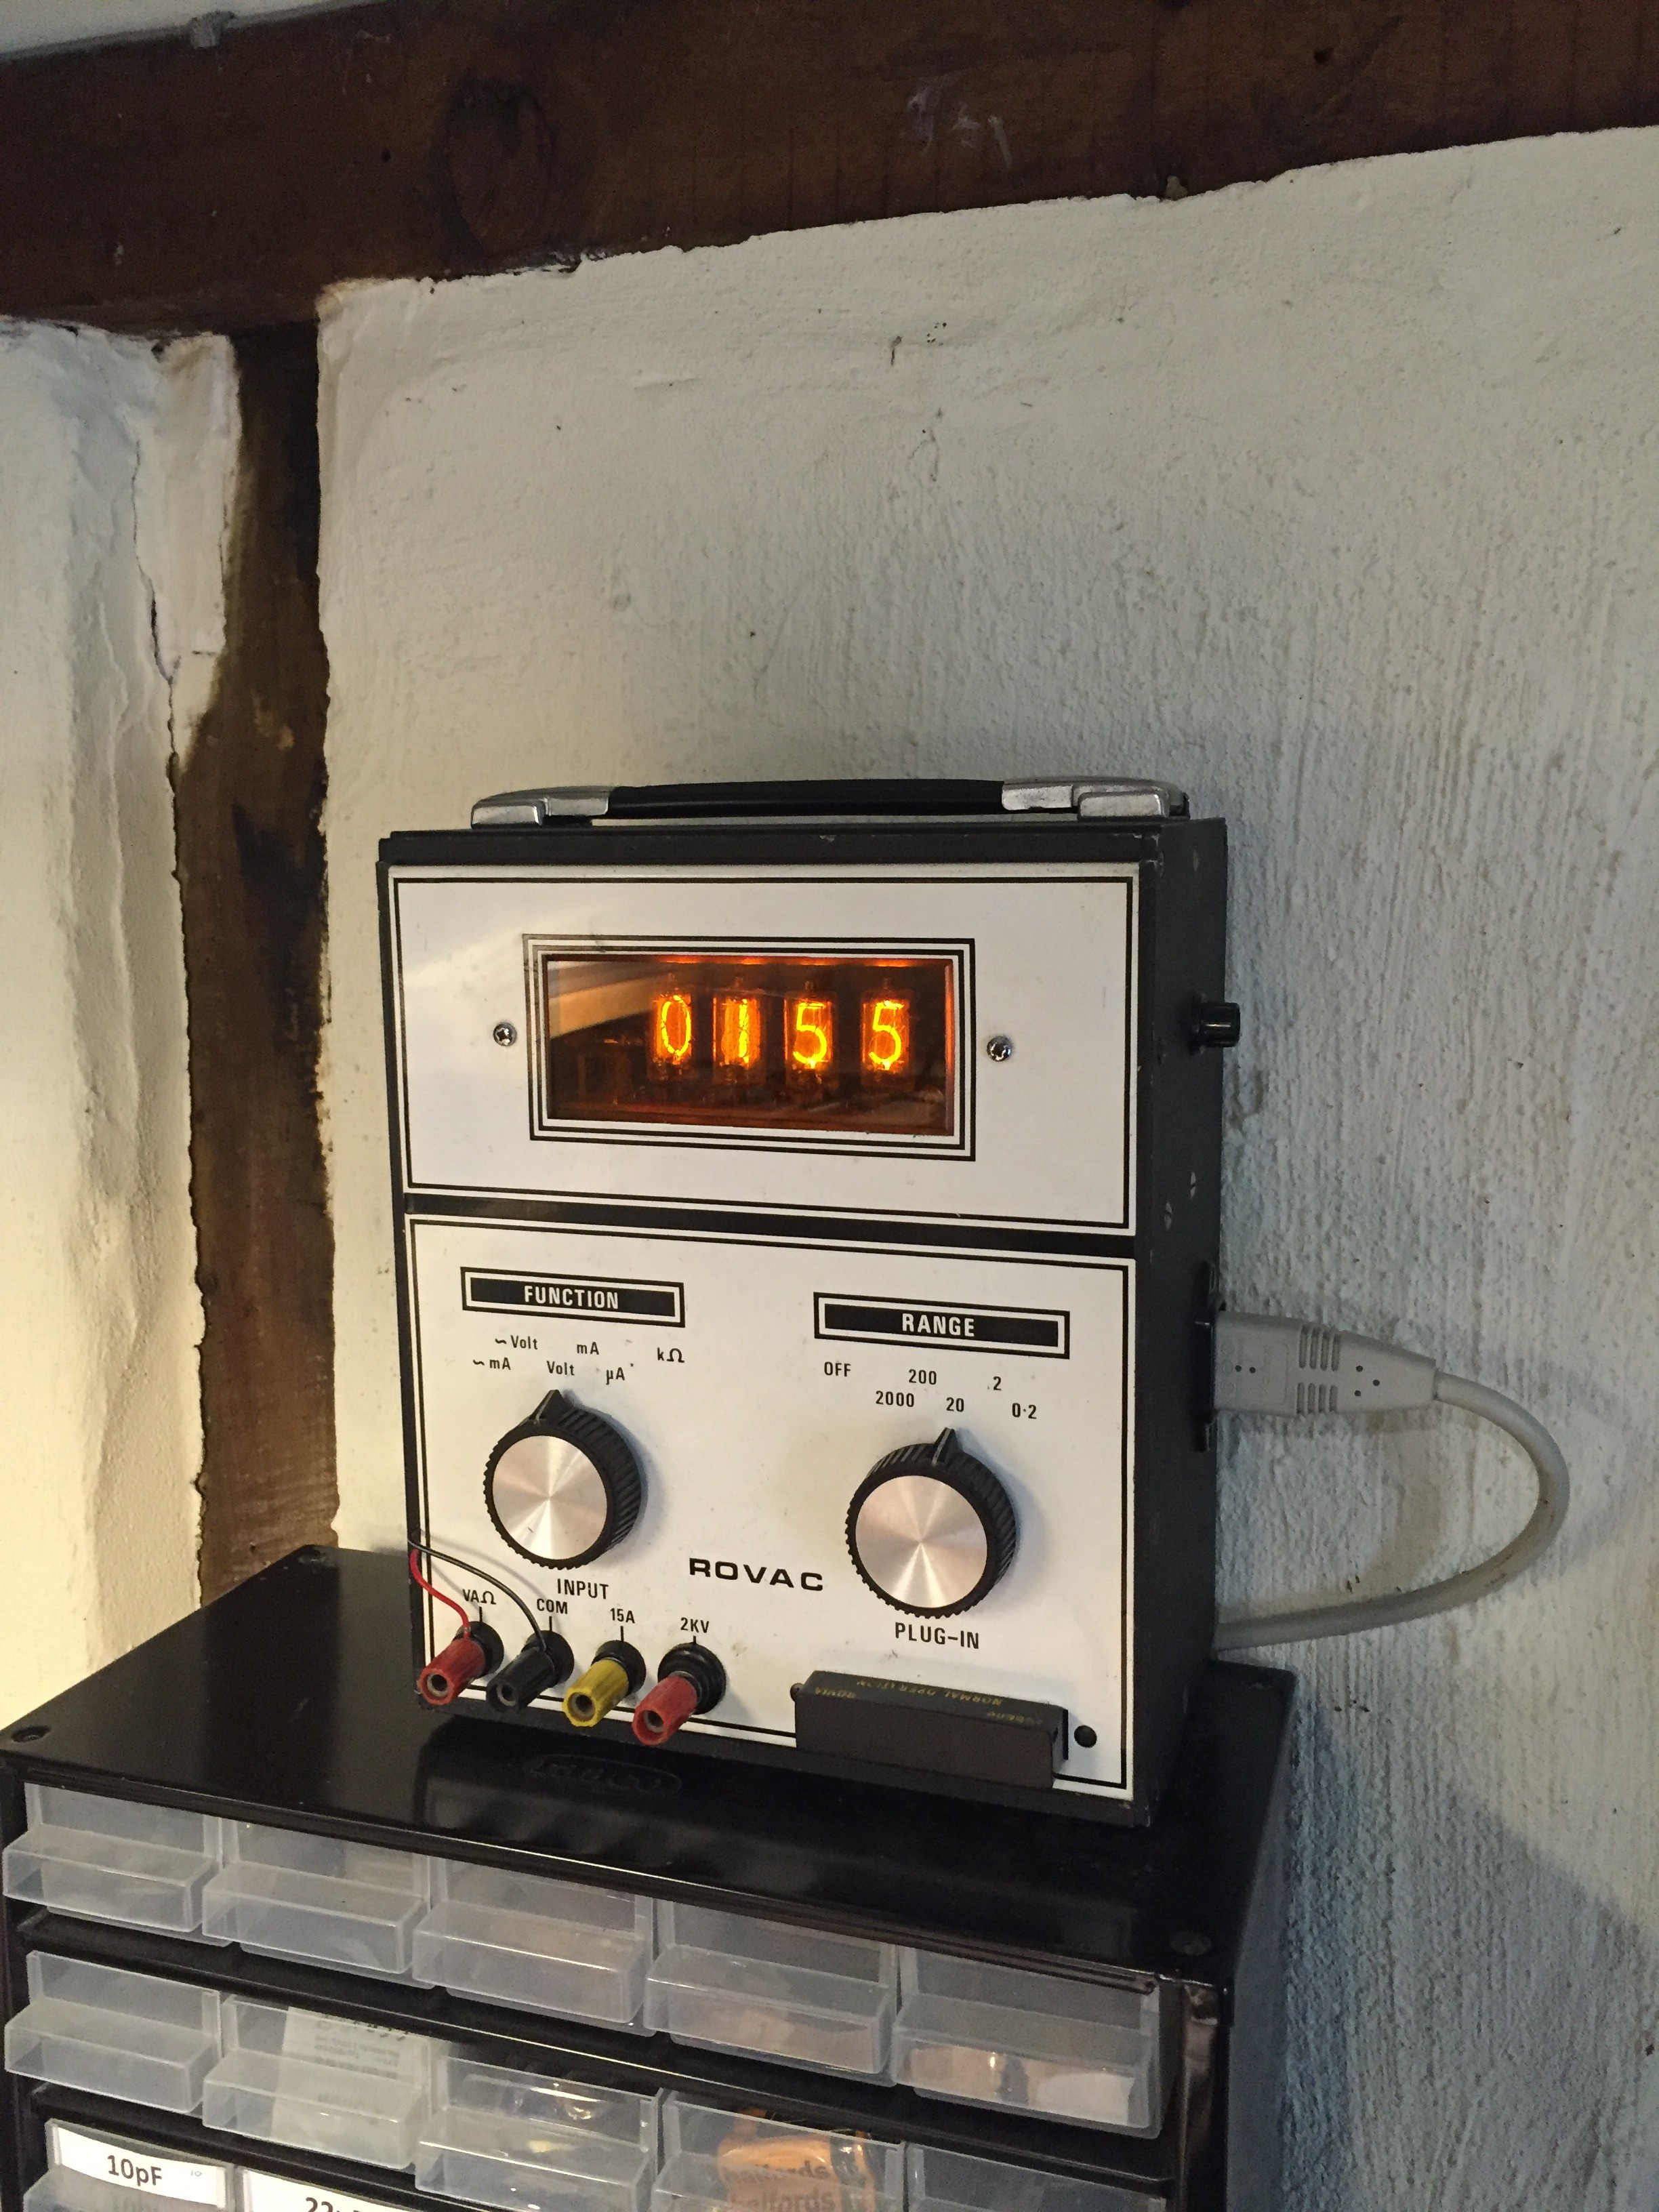
I recently acquired a vintage nixie tube multi-meter on eBay, with the not so original idea of converting it into a clock.
However, rather than hack around with the internal circuitry, I decide to see if I could keep the meter intact and use the existing voltmeter functionality to display time. The basic idea is to send the meter a voltage corresponding to the time, so e.g. 12:45 becomes 12.45V. The meter has a 20V range which displays a fixed 2 decimal places which suits my purpose just fine. Unfortunately there is a hard limit to 20V on this range so a full 24 hour clock is not possible, but a 12 hour clock and maybe a 20 hour clock are.
The high level schematic is:
RTC -> Arduino -> DAC ->Multi-meter
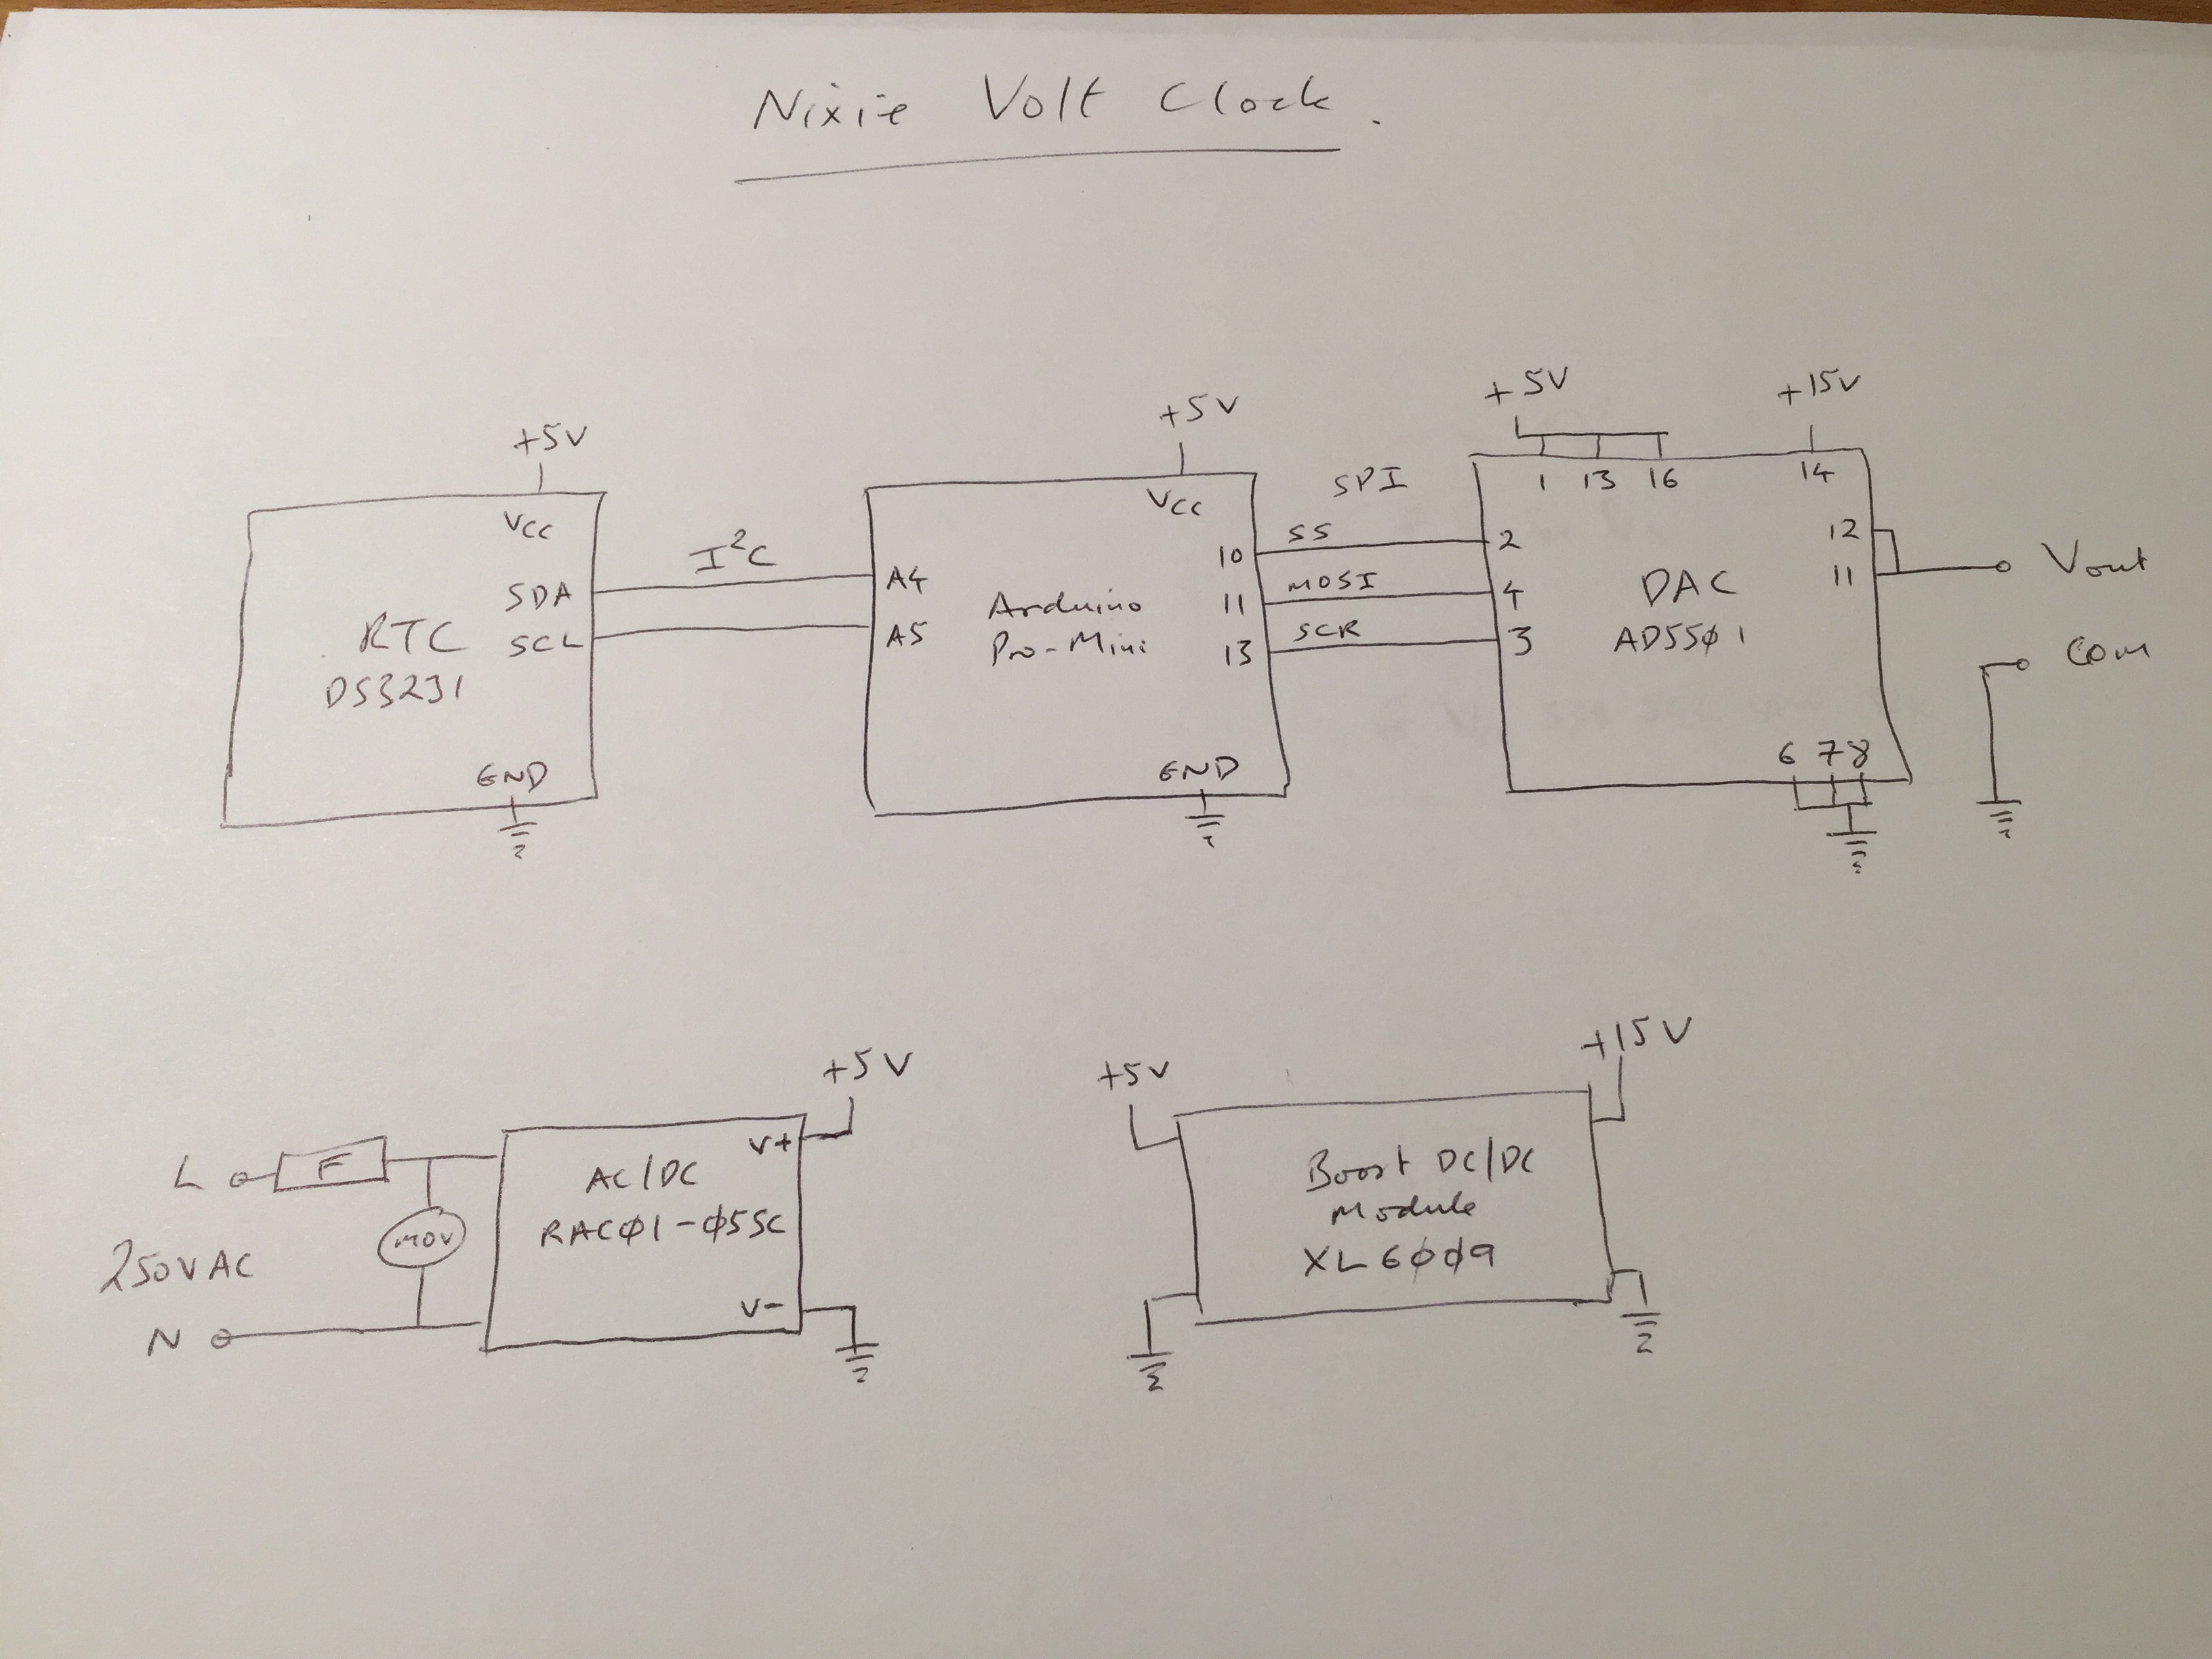
Each minute on the display corresponds to 10mV so the DAC must be at least this resolution. I used an AD5501 which has 12bit resolution and can work at up to 60V. For my needs I used the 30V range which works out at 7.3mV per bit, just enough. This DAC also has an integrated voltage reference which reduces the component count. It comes in a TSSOP package so was soldered onto a breakout board for easier prototyping.
For the RTC I used a DS3231 module. This is accurate to about 1 min/year and has a battery backup. It can be controlled from the arduino over an I²C bus.
The Arduino runs a simple program which at every new minute gets the current time, calculates the required voltage for the time, offsets it by a calibration factor and sends it to the DAC. The program also accepts a few commands over the serial port to calibrate the display and set the current time.
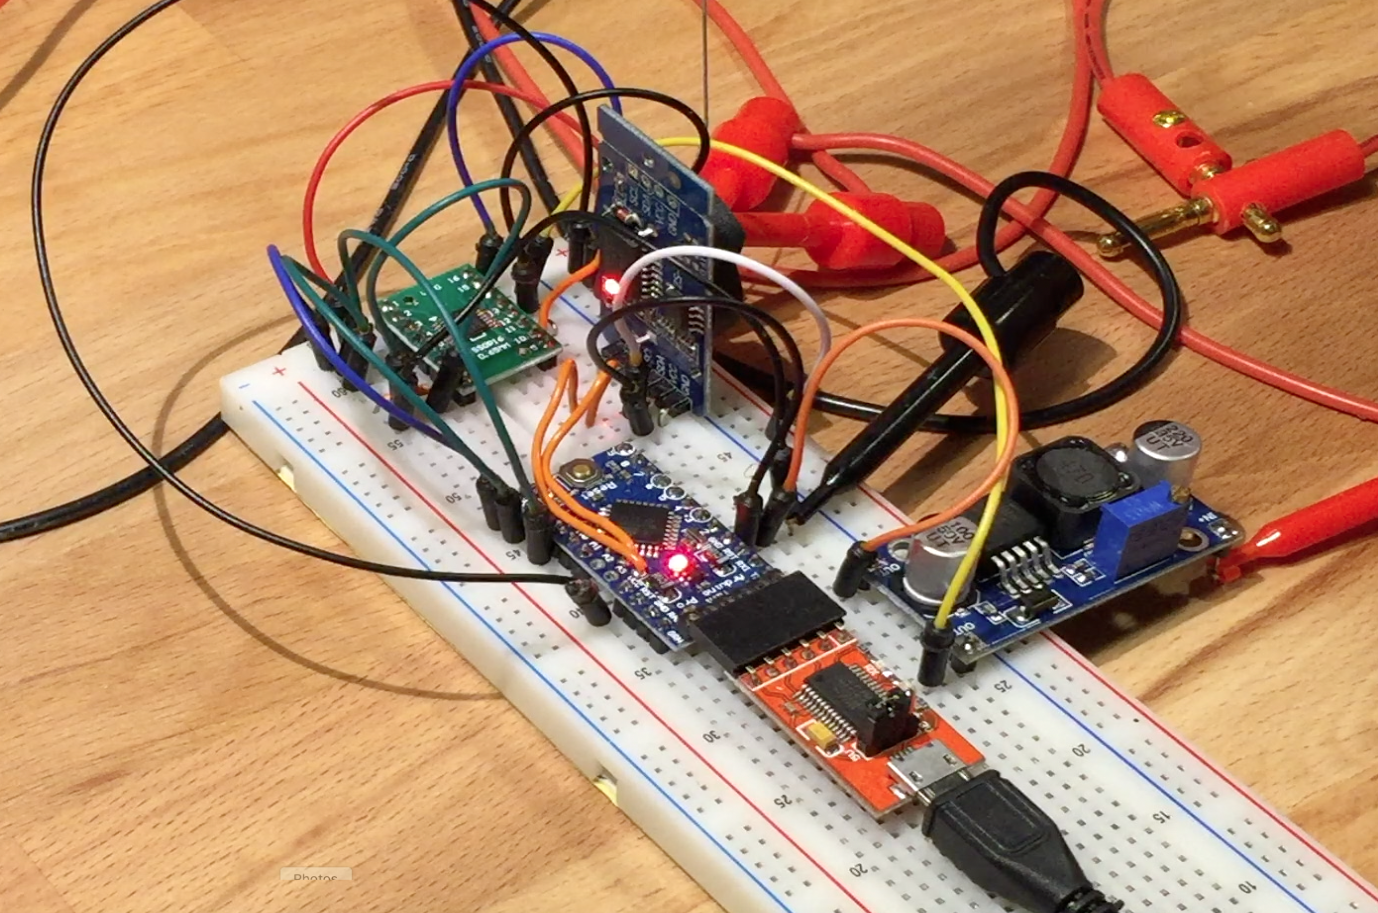
Here is everything running on a breadboard:
For power, rather than tap into the internal multi-meter power buses I hooked up a simple 240VAC/5VDC module with a cheap Chinese boost converter to give 15V for the analogue power.
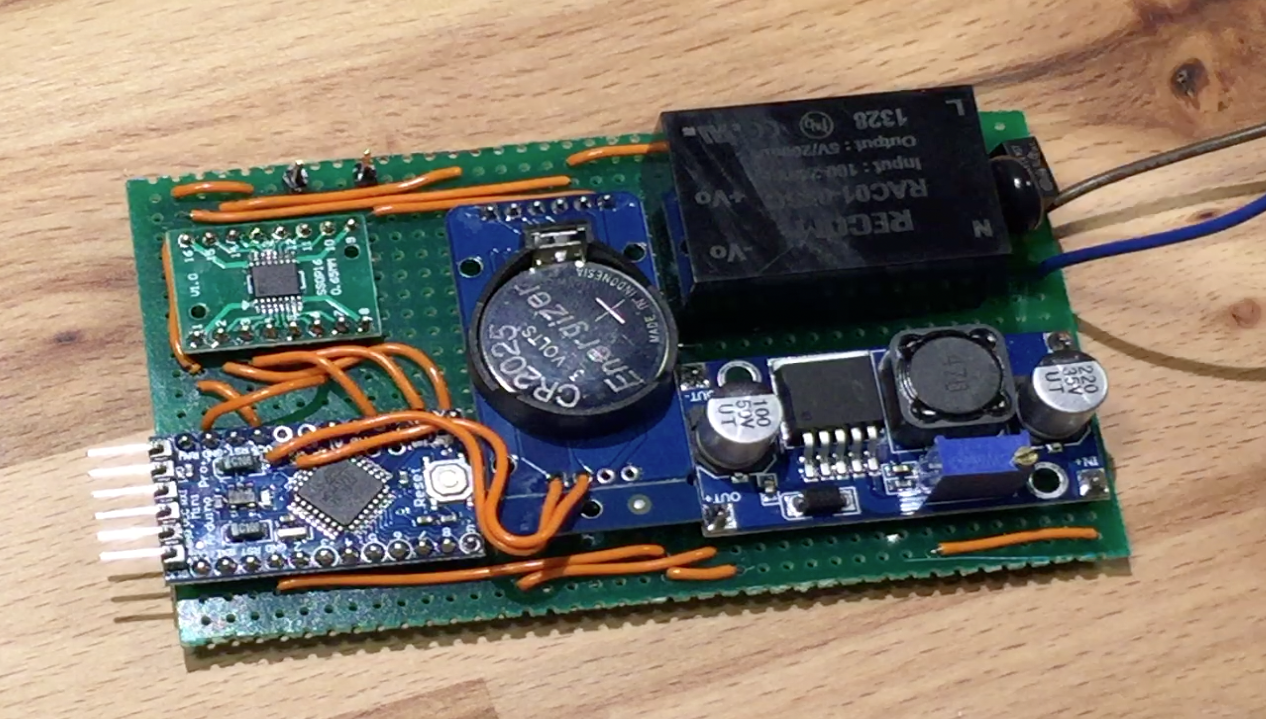
The meter has space inside for a battery so there was no need to miniaturise the component layout and I just wired the modules together on a bit of strip-board, fixed it to an insulating base and popped it into the meter.